わずか10gでありながら4K60fpsの映像が撮れる期待のカメラ「Caddx Loris 4K」を搭載したドローン「iFlight Alpha A85 85mm」が到着しましたので、開封&外観チェック&バインドを済ませました。
本当はテストフライトとカメラのテストまでしたいのですが、まだしばらく後になりそうです。
外観とバインド方法を紹介していきます。
![](https://i0.wp.com/notthi.com/wp/wp-content/uploads/2020/07/alpha-a85-open-202007210520520.jpg?resize=500%2C500&ssl=1)
まずは外観。
![](https://i0.wp.com/notthi.com/wp/wp-content/uploads/2020/07/alpha-a85-open-202007210520521.jpg?resize=500%2C500&ssl=1)
こんな小さなカメラで4K60fpsが撮れるとは・・・
![](https://i0.wp.com/notthi.com/wp/wp-content/uploads/2020/07/alpha-a85-open-202007210520522.jpg?resize=500%2C500&ssl=1)
左側にmicroSDカードスロットがあります。
![](https://i0.wp.com/notthi.com/wp/wp-content/uploads/2020/07/alpha-a85-open-202007210520523.jpg?resize=500%2C500&ssl=1)
逆側には、カメラの操作ボタンでしょうか?
![](https://i0.wp.com/notthi.com/wp/wp-content/uploads/2020/07/alpha-a85-open-202007210520524.jpg?resize=500%2C500&ssl=1)
機体下側にMicroUSBのコネクタがあります。
DAISOの巻取り式ケーブルはそのまま差し込んでBetaflightに接続することができました。
![](https://i0.wp.com/notthi.com/wp/wp-content/uploads/2020/07/alpha-a85-open-202007210520525-1.jpg?resize=500%2C500&ssl=1)
MicroUSBスロットを延長するアダプターも付属しています。
![](https://i0.wp.com/notthi.com/wp/wp-content/uploads/2020/07/alpha-a85-open-202007210520526-1.jpg?resize=500%2C500&ssl=1)
その他予備のペラやネジが付属。
![](https://i0.wp.com/notthi.com/wp/wp-content/uploads/2020/07/alpha-a85-open-202007210520527-1.jpg?resize=500%2C500&ssl=1)
バッテリーのクッション?は早速貼り付けました。
![](https://i0.wp.com/notthi.com/wp/wp-content/uploads/2020/07/alpha-a85-open-202007210520528.jpg?resize=500%2C500&ssl=1)
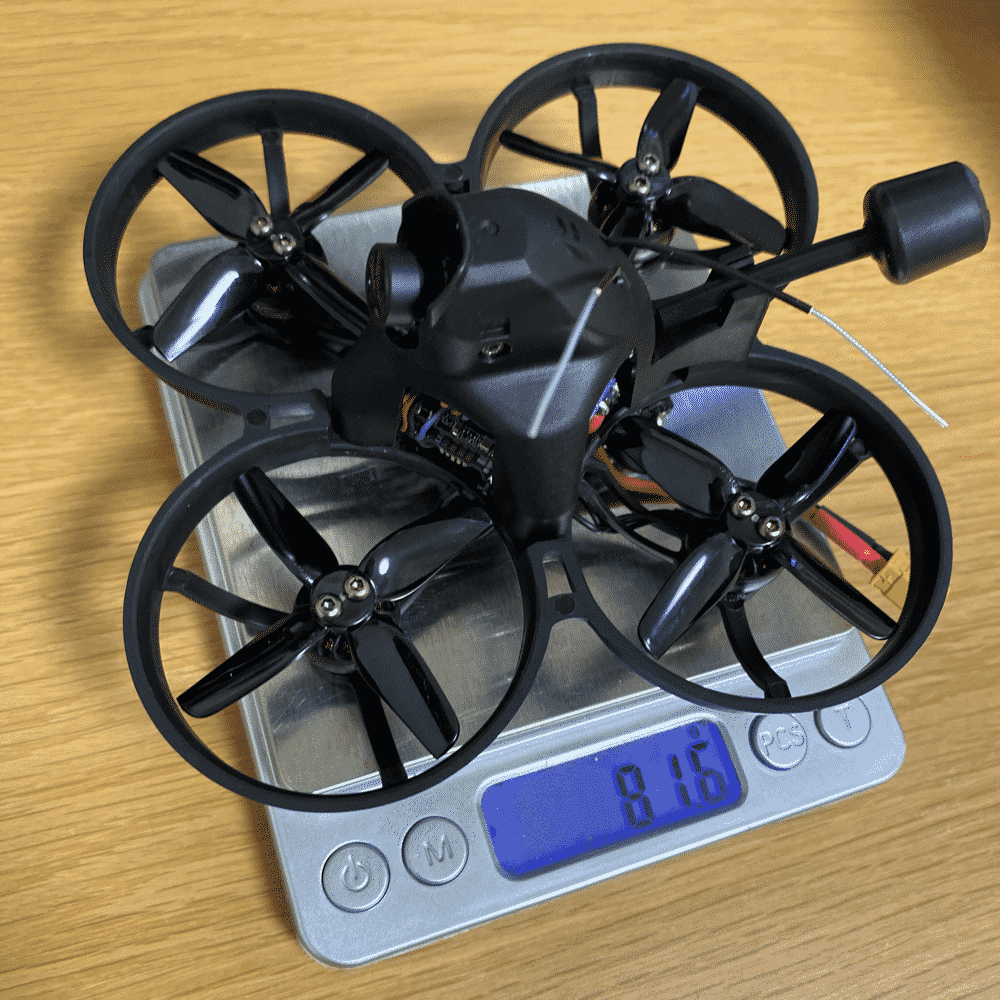
バッテリー無しの機体重量は81.6グラム。
![](https://i0.wp.com/notthi.com/wp/wp-content/uploads/2020/07/alpha-a85-open-202007210520529.jpg?resize=500%2C500&ssl=1)
近いサイズのCineking 4K が102.3グラムであることを考えると、かなり軽量に作られているようです。
![](https://i0.wp.com/notthi.com/wp/wp-content/uploads/2020/07/alpha-a85-open-2020072105205210-1.jpg?resize=500%2C500&ssl=1)
バインド方法(Frsky XM+の場合)
送信機をBind待ち状態にします。
(写真ではすでにバインド済のため送信機の緑ランプが点灯していますが、バインド前では消灯しています)
![](https://i0.wp.com/notthi.com/wp/wp-content/uploads/2020/07/alpha-a85-open-2020072105205211-1.jpg?resize=500%2C500&ssl=1)
ここが最難関。1人では難しいかもしれませんが、
受信機(XM+)のバインドボタンを押しながら、バッテリーを接続すると、受信機がバインド待ち状態になります。(緑ランプ点滅)
![](https://i0.wp.com/notthi.com/wp/wp-content/uploads/2020/07/alpha-a85-open-2020072105205312-1.jpg?resize=500%2C500&ssl=1)
その状態で送信機の「Bind」を押すと、バインドできます。
![](https://i0.wp.com/notthi.com/wp/wp-content/uploads/2020/07/alpha-a85-open-2020072105205313-1.jpg?resize=500%2C500&ssl=1)
あとは、Betaflightに接続して、設定する流れです。
まとめ
早くやることやって、外で飛ばしたい!!
コメントを残す